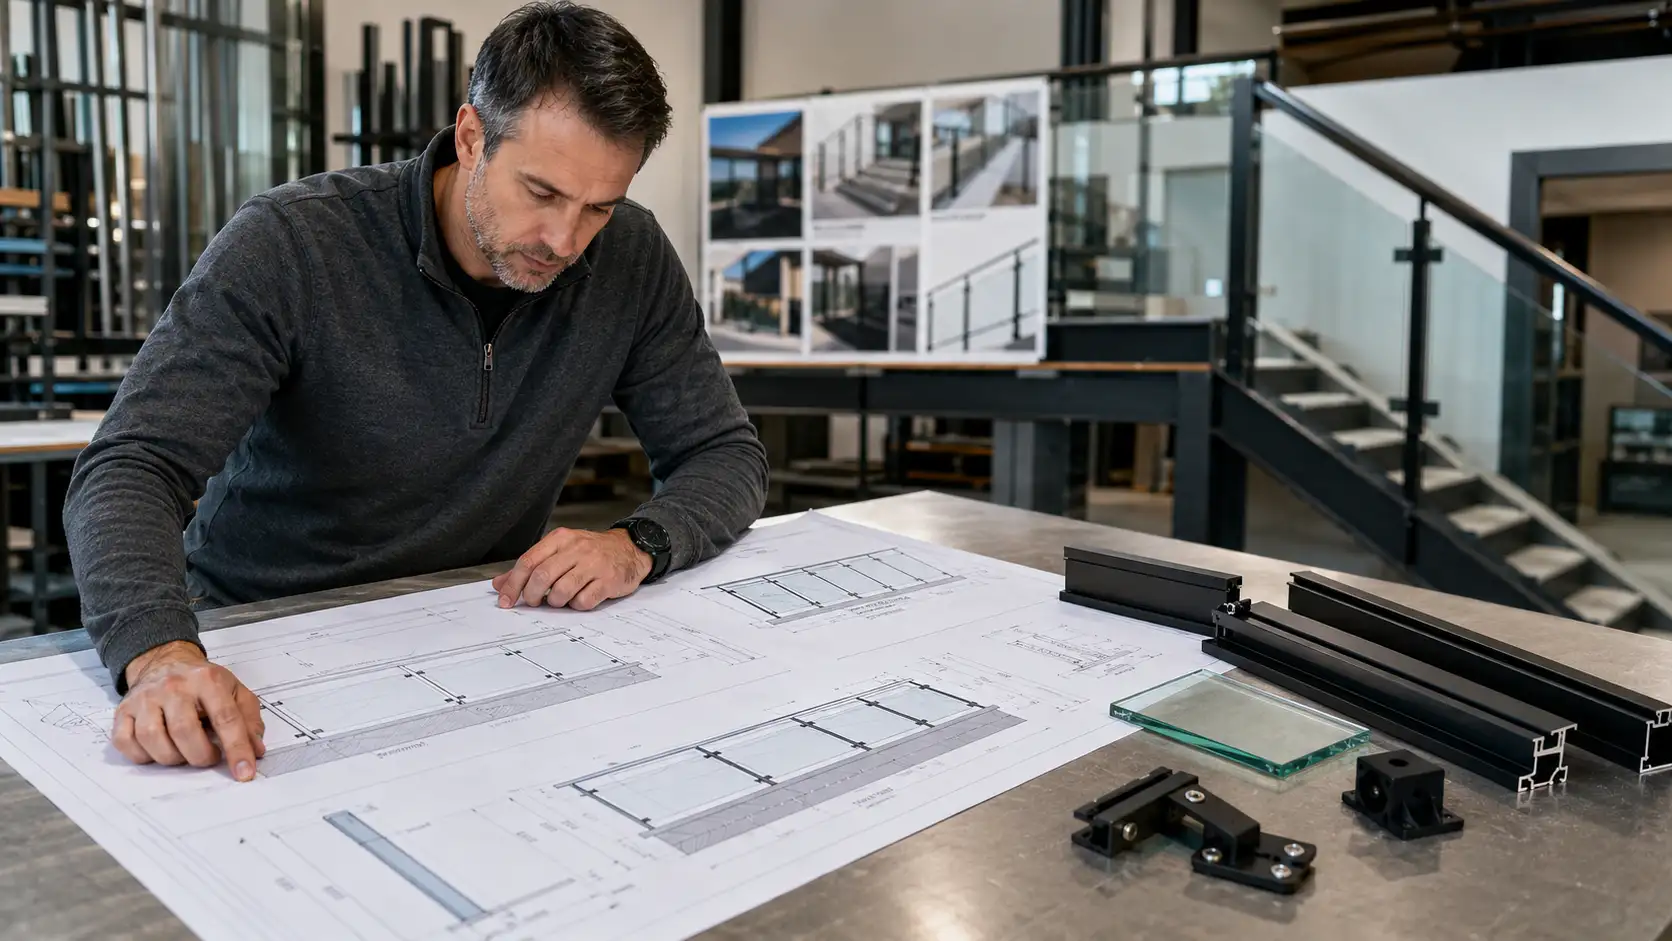
Railing shop drawings are one of the most useful planning tools in a railing project because they help turn design intent into clear fabrication and installation details.
Before aluminum railings, glass railings, dividers, or fence systems are manufactured, there needs to be a shared understanding of what is being built, where it will go, how it will attach, and how the finished system should look. That is where railing shop drawings become valuable.
For homeowners, property managers, builders, contractors, and developers, reviewing these drawings carefully can prevent expensive mistakes. A missed measurement, unclear mounting detail, wrong finish, or incorrect post location can lead to delays, rework, site conflicts, and frustration.
The good news is that you do not need to be an engineer to understand the basics. You simply need to know what to look for, what questions to ask, and when to pause before approving fabrication.
What Are Railing Shop Drawings?
Railing shop drawings are project-specific drawings that show how a railing system will be fabricated and installed. They are more detailed than a general design sketch and more practical than a broad architectural concept.
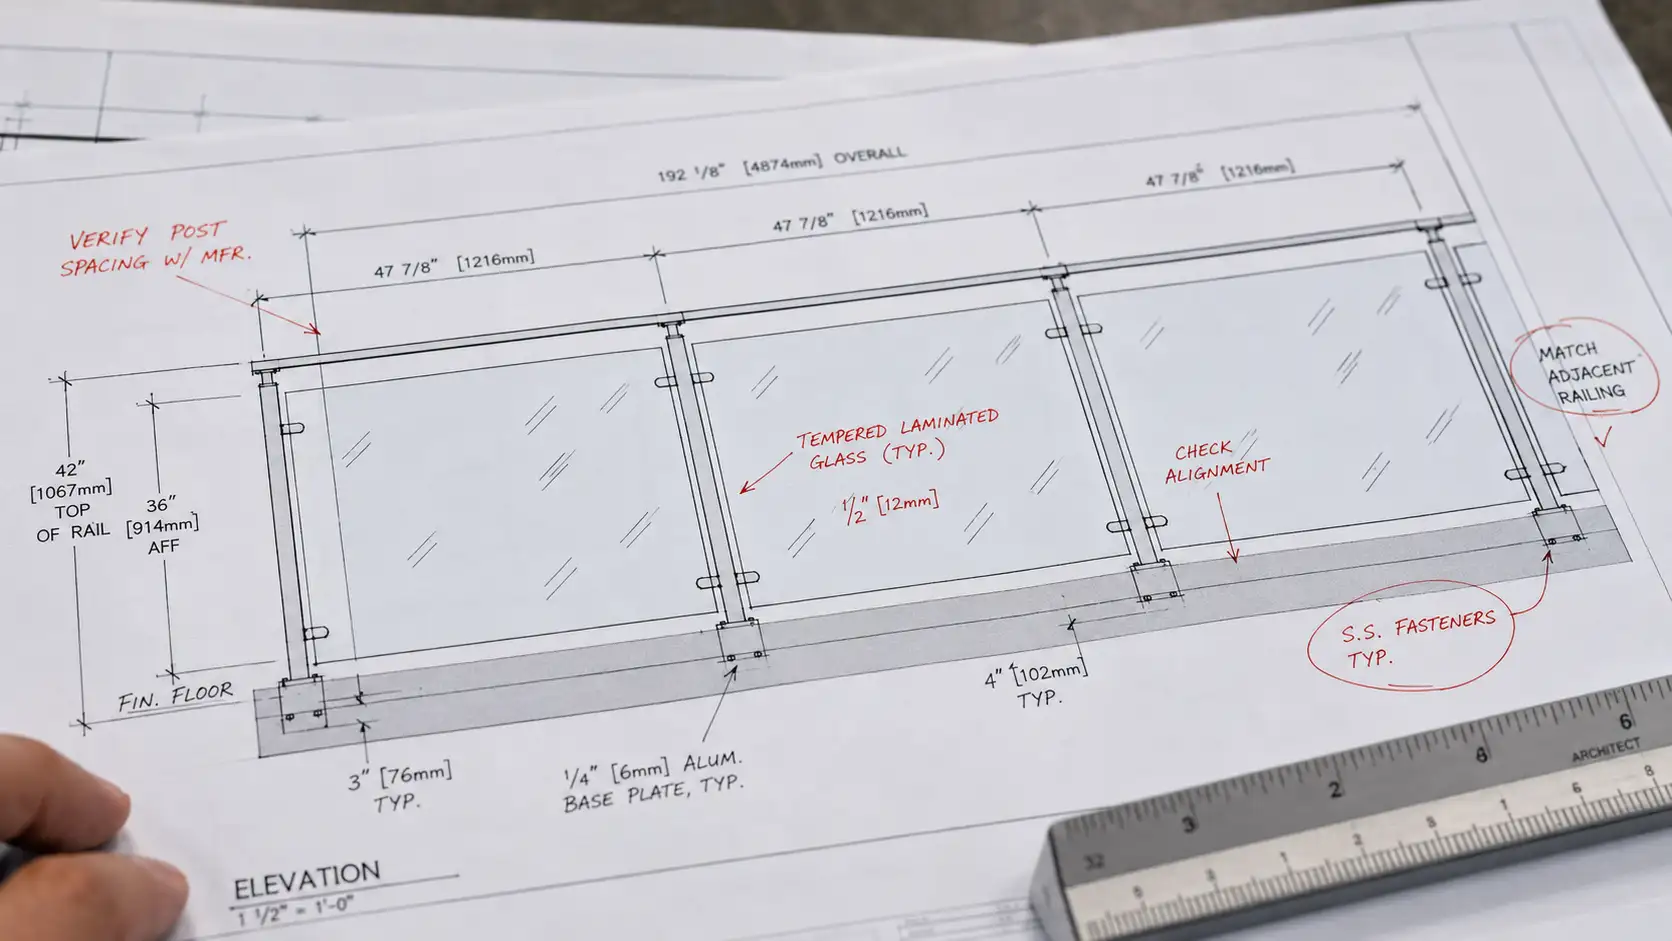
They usually show railing layouts, heights, post locations, panel sizes, mounting methods, material notes, finish details, and site-specific conditions. For a project involving aluminum railings, the drawings may show picket spacing, top rail profiles, post placement, base plates, fasteners, and transitions at corners or stairs.
For a project involving glass railings, the drawings may also include glass panel sizes, gaps between panels, hardware notes, railing cap details, and attachment points.
A common question is whether railing shop drawings are the same as architectural drawings. They are not. Architectural drawings usually communicate the overall design intent. Railing shop drawings translate that intent into fabrication and installation information. In simple terms, architectural drawings say what the project should achieve, while shop drawings explain how the railing system will be built to suit that specific project.
Why Railing Shop Drawings Matter Before Fabrication
Fabrication is the point where decisions become physical. Once railing components are cut, drilled, welded, finished, or prepared for installation, changes become more difficult and more costly.
That is why railing shop drawings should be reviewed before production begins. They give everyone a chance to confirm the details while changes are still manageable.
For example, a deck may look straightforward during the design stage, but field conditions can introduce complications. The surface may slope. The finished floor height may differ from the plan. A stair run may need a different railing angle. A balcony edge may require a specific post setback. A gate or divider may need more clearance than expected.
Without a clear drawing review, these details can be missed until installation day. At that point, crews may discover that posts conflict with drainage, panels do not fit, anchors do not align with the structure, or a railing return does not match the site condition.
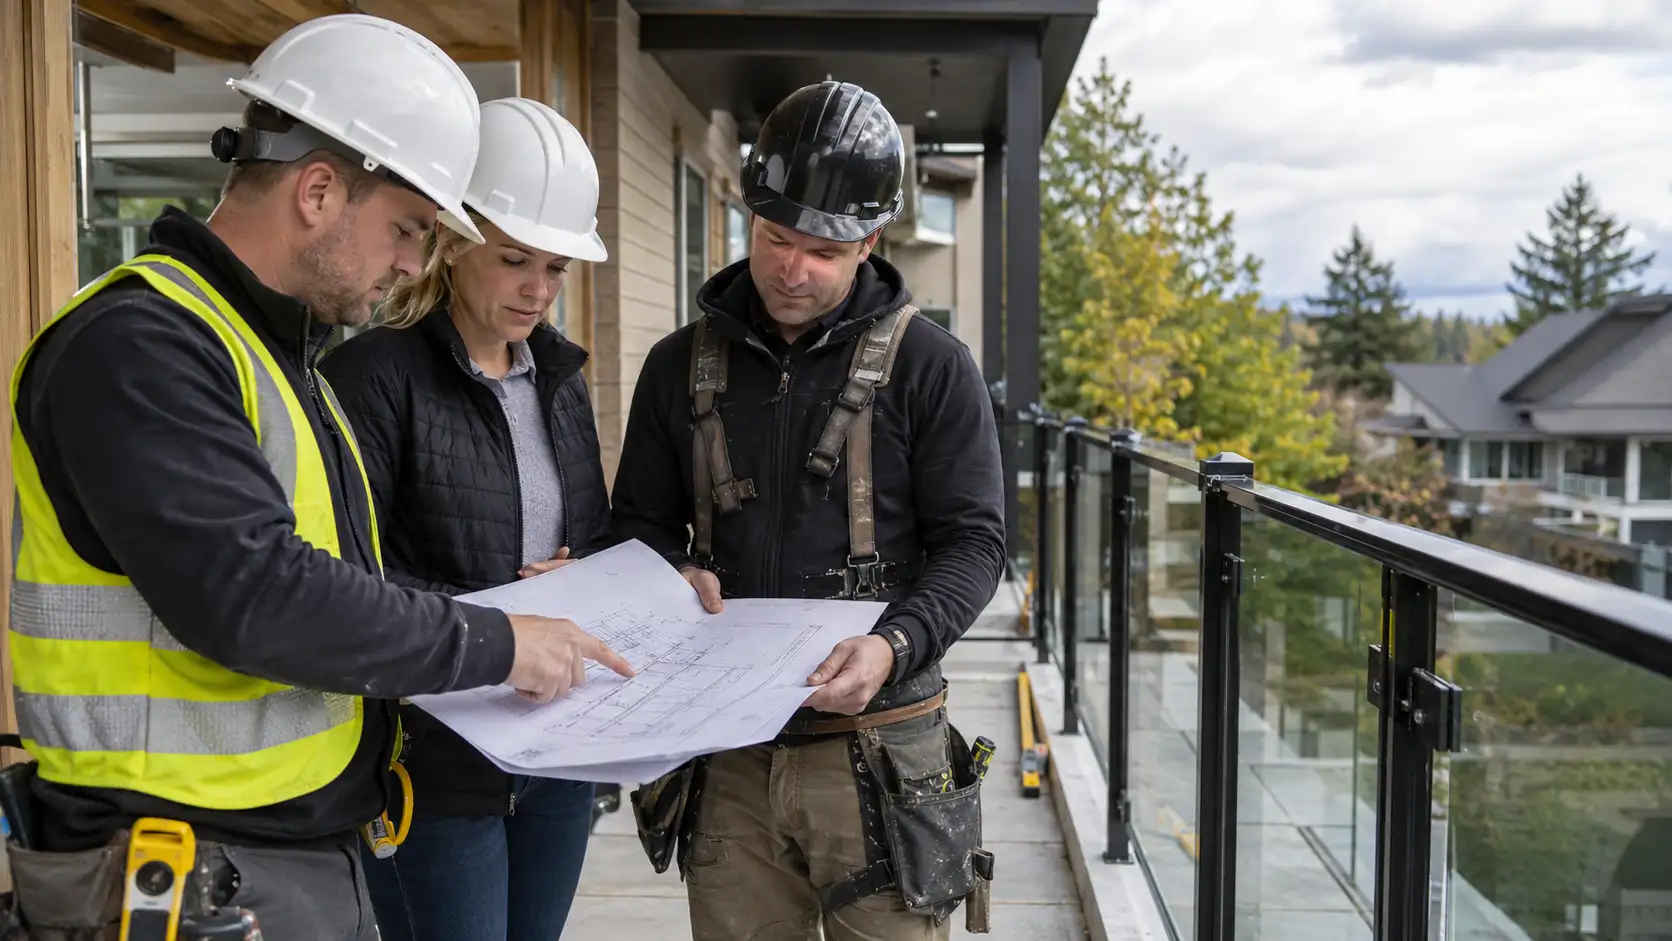
Railing shop drawings help reduce those risks by creating a clear reference point before materials are prepared. They also help coordinate multiple parties, including the owner, builder, installer, manufacturer, architect, and engineer.
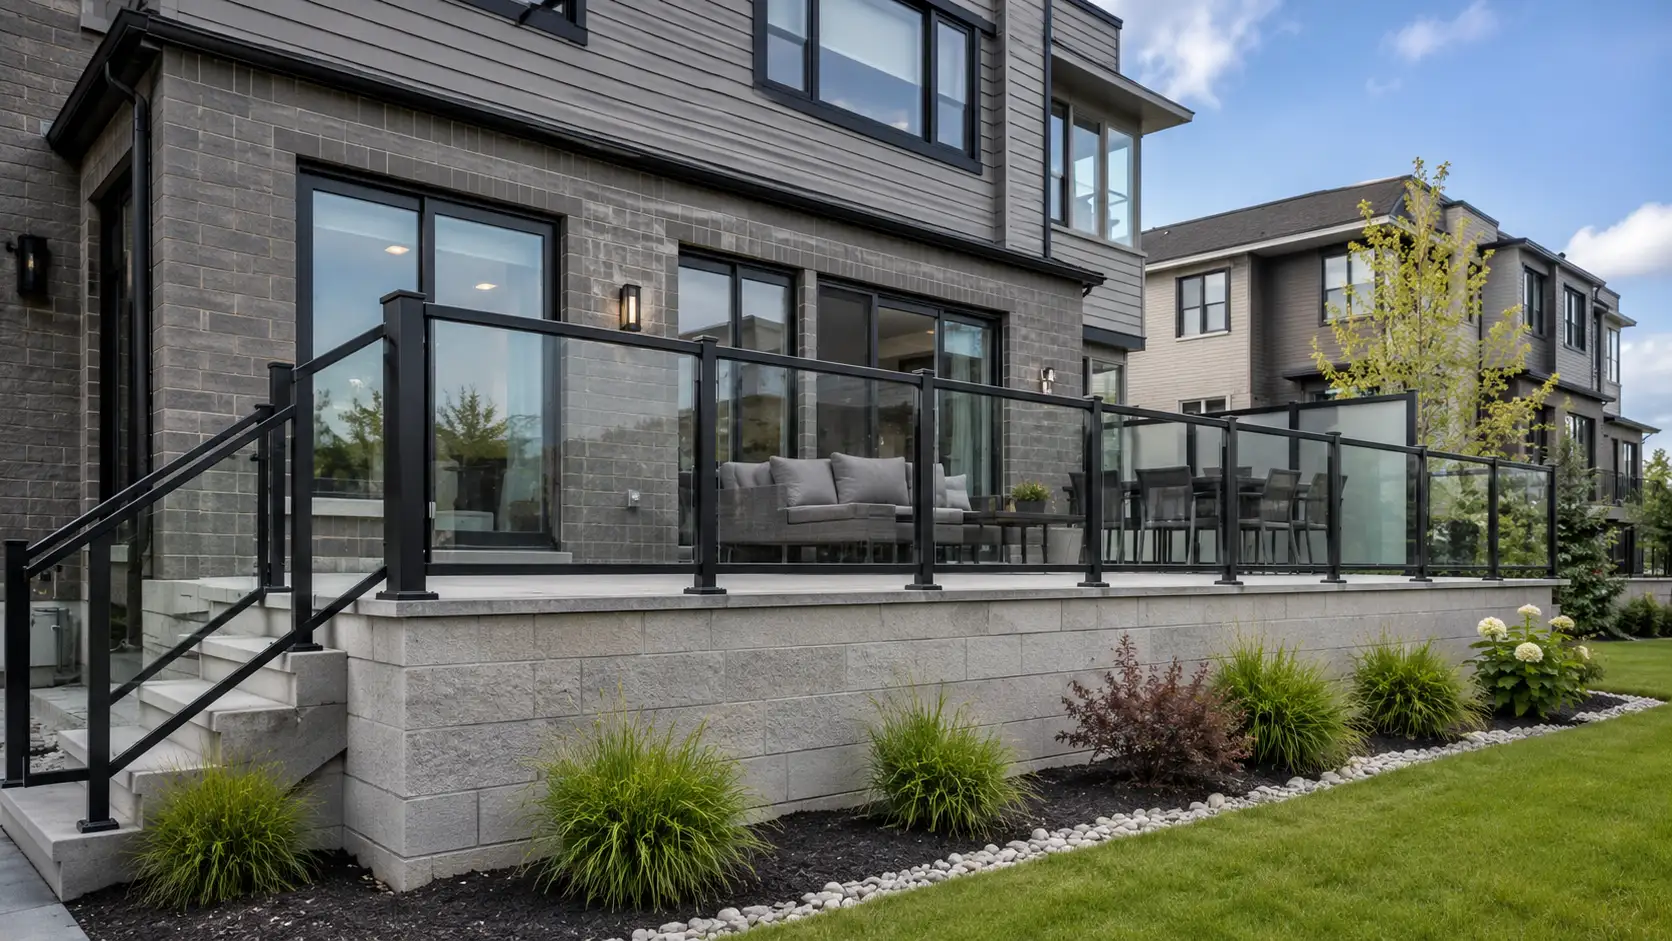
For exterior projects, this is especially important because railing systems often connect with other building elements. A project involving exterior aluminum railings may need to account for waterproofing, deck boards, concrete edges, finished cladding, drainage paths, and long-term exposure to Canadian weather.
Railing Shop Drawings: 7 Details Worth Reviewing Closely
Not every project requires the same level of detail, but every project benefits from a careful review. When you receive railing shop drawings, these are the seven areas worth checking before approval.
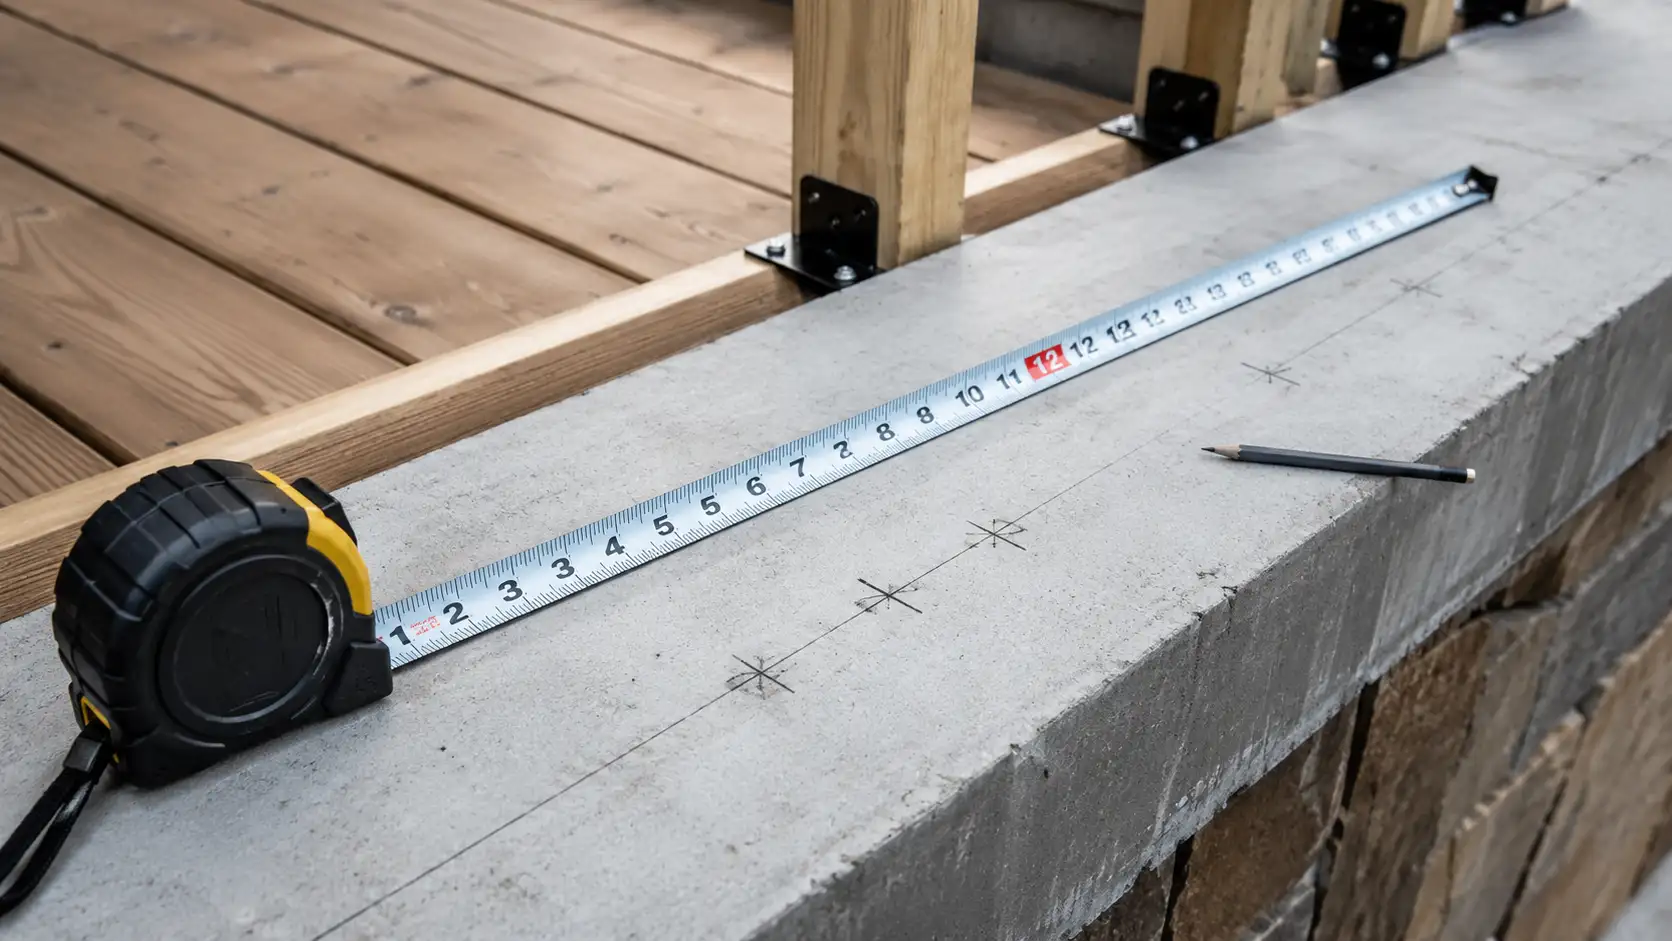
1. Overall layout and opening lengths
Start with the big picture. Does the drawing show the correct deck, balcony, stair, terrace, walkway, pool area, or property line? Are the opening lengths accurate? Are all sides of the railing run included?
This may sound basic, but layout mistakes are among the easiest errors to overlook. If a railing run is shown on the wrong side of a landing or a corner return is missing, the finished product may not match the actual site.
It is also helpful to compare the drawing to photos, site measurements, and the latest construction plans. If the project has changed since the first estimate, the railing layout should reflect those changes.
2. Railing height and guard or handrail function
Height is one of the most important details in any railing project. A guard, handrail, privacy screen, divider, and decorative railing may all serve different purposes.
If you are unsure whether a specific condition needs a guard, a handrail, or both, review the difference before approving details. Alumiguard’s article on guard vs handrail requirements for Ontario decks is a useful companion piece for understanding how function affects railing decisions.
When reviewing railing shop drawings, check the noted heights carefully. Make sure the drawing is clear about finished floor height, stair nosing height, landing transitions, and any changes in elevation. A railing that looks correct on paper can create issues if the height is measured from the wrong reference point.
3. Post locations and panel spacing
Post placement affects appearance, strength, installation, and usability. It also affects how balanced the finished railing system looks.
For picket railings, review whether the posts are evenly spaced and whether the picket layout looks consistent. For glass railings, review the glass panel widths and gaps. For decorative systems, check whether repeated patterns or custom elements align properly across the run.
Good railing shop drawings should make post locations easy to understand. If a post lands too close to a corner, too close to an edge, or in conflict with another building component, it should be addressed before fabrication.
For projects that use a more stylized product, such as deco railings, the layout review becomes even more important because the visual rhythm of the railing is part of the final design.
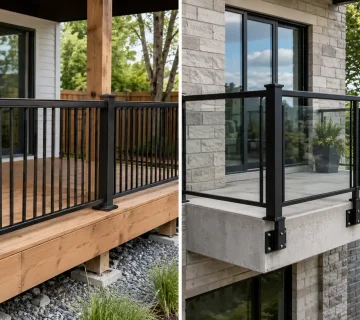
4. Mounting surface and anchoring method
A railing system is only as reliable as the surface it attaches to. That is why mounting details deserve careful attention.
Railing shop drawings should make it clear whether posts are surface-mounted, fascia-mounted, core-drilled, side-mounted, or attached in another way. They should also identify the mounting surface, such as concrete, wood framing, steel, or another structural condition.
For example, installing on concrete is not the same as installing on a wood deck. Alumiguard’s installation process pages for picket railing on concrete floors, glass railing on concrete floors, picket railing on wood floors, and glass railing on wood floors show how installation conditions can vary based on surface type.
If the mounting surface is unclear, ask questions before approval. The right anchor strategy depends on site conditions, structure, railing type, and project requirements.
5. Material, finish, and product style
Railing drawings should clearly identify the product type and finish. This includes whether the system uses aluminum pickets, glass panels, privacy dividers, decorative elements, gates, or fencing components.
Finish matters because it affects the appearance and long-term maintenance of the railing. For many exterior projects, powder coating is a popular choice because it provides a clean, durable finish. If finish care is part of your planning, Alumiguard’s guide on powder coated aluminum railings explains how proper maintenance helps protect the look of the system over time.
When reviewing railing shop drawings, check colour, finish, profile, and product notes. If the drawing says black aluminum railing but the project requires a different colour, the correction should happen before fabrication.
6. Glass, dividers, and visibility needs
Glass and divider systems require an extra level of coordination because visibility, privacy, wind exposure, and panel sizing all matter.
For glass railings, review the panel dimensions, hardware locations, and gaps between panels. For divider systems, check height, width, privacy level, and how the panels connect to the surrounding structure.
If the project involves outdoor separation between neighbours, units, patios, or balconies, glass and vinyl dividers may be part of the solution. In that case, railing shop drawings should clearly show where railing ends and divider sections begin.
This is also where user experience matters. A glass system may preserve views. A vinyl or privacy divider may provide more separation. A picket railing may feel more open. The drawing review is the right time to confirm that the system supports the way the space will actually be used.
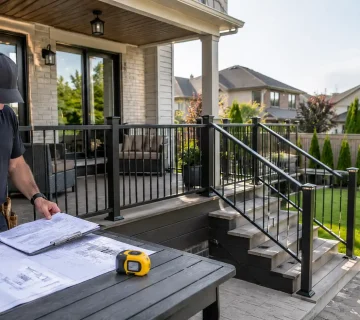
7. Site access, sequencing, and installation notes
Railing drawings often focus on the product itself, but installation planning is just as important.
Can materials be brought to the work area safely? Is the site ready for installation? Are other trades still working in the same area? Are finished surfaces protected? Are there access restrictions for balconies, rooftops, or multi-unit buildings?
These details may not all appear in the drawing, but the drawing review can reveal questions that need to be answered. For larger projects, especially multi-residential or commercial work, coordination can prevent avoidable delays.
What Should Railing Shop Drawings Include?
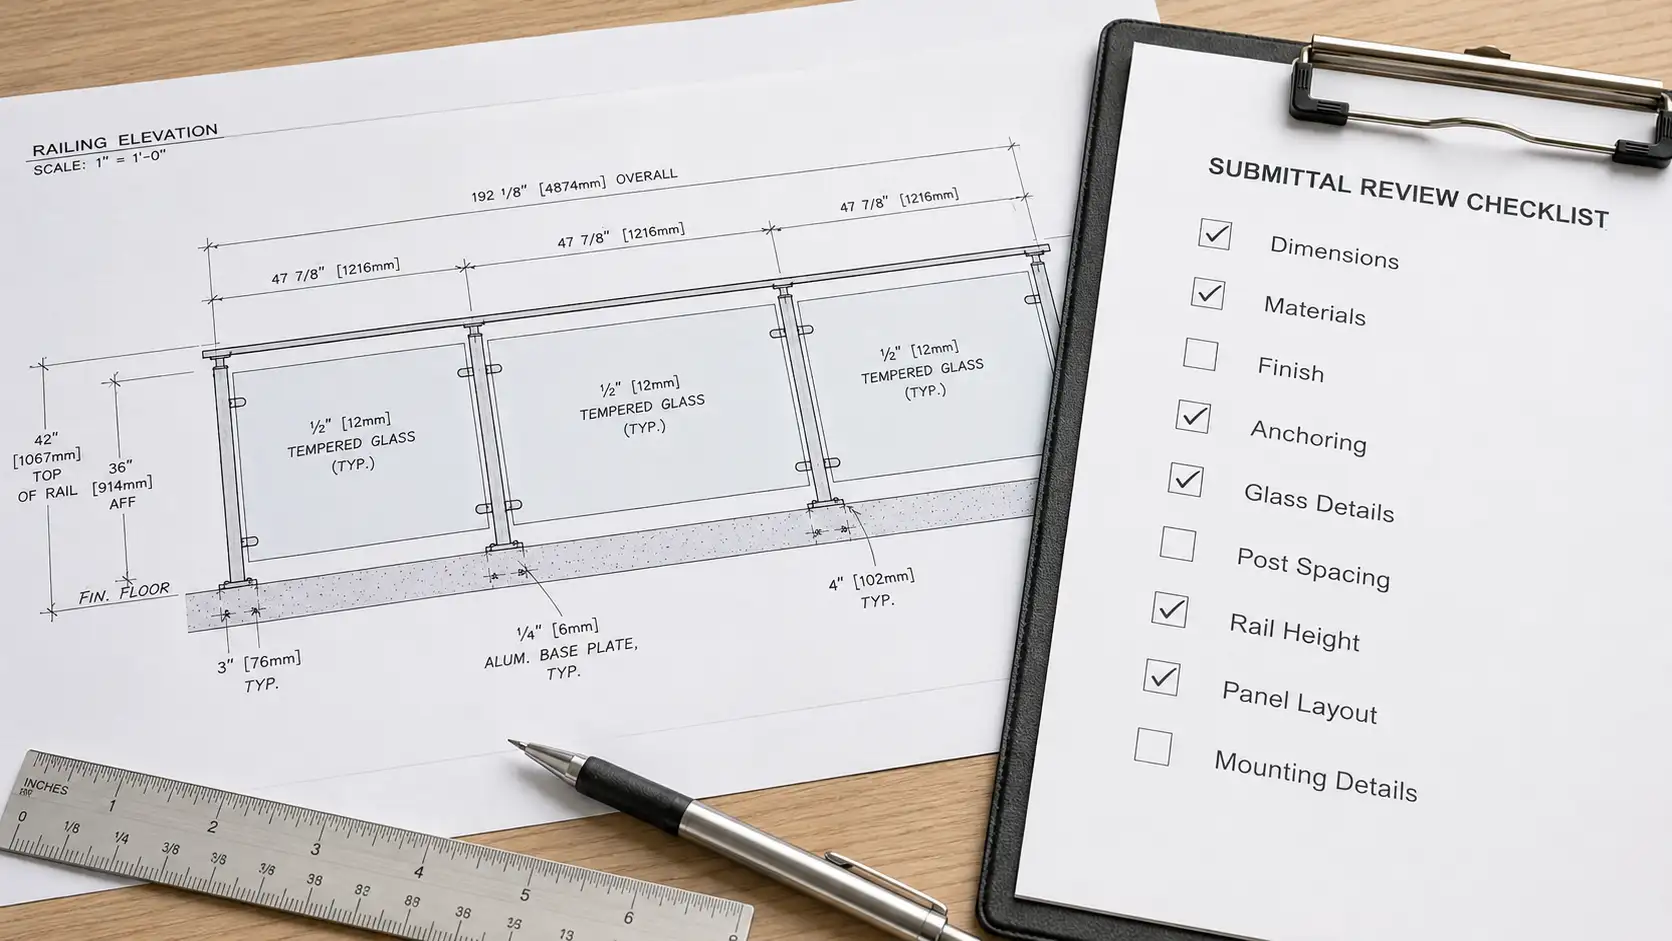
Railing shop drawings should be clear enough for review, fabrication, and installation coordination. The exact format may vary by project, but most complete railing submittals include several core details.
| Drawing Detail | Why It Matters |
|---|---|
| Project name and location | Helps ensure the drawing is tied to the correct site, phase, or building area. |
| Plan and elevation views | Shows where railing runs are located and how the system looks from the side. |
| Overall dimensions | Confirms run lengths, heights, returns, openings, and transitions. |
| Post and panel layout | Clarifies spacing, rhythm, glass panel sizes, picket sections, and corners. |
| Mounting and anchoring notes | Shows how the railing attaches to concrete, wood, steel, or another surface. |
| Material and finish details | Confirms product type, colour, coating, glass type, hardware, and visible profiles. |
| Revision date and approval status | Prevents teams from using outdated drawings during fabrication or installation. |
One helpful question to ask is this: could someone unfamiliar with the project understand the basic railing layout from the drawing? If the answer is no, the drawing may need clarification before approval.
That does not mean every small project requires complex documentation. A straightforward residential deck railing may need less detail than a large multi-level development. Still, even simple railing shop drawings should clearly communicate the essential measurements and product decisions.
Common Mistakes Railing Shop Drawings Help Prevent
The main purpose of railing shop drawings is not to make the project look more complicated. The purpose is to make the project clearer before mistakes become expensive.
One common issue is relying on old measurements. If a deck, slab, balcony, or stair has changed since the first site visit, the drawings should be updated. Even a small difference can affect panel sizing, post spacing, or corner alignment.
Another mistake is approving drawings without checking the mounting condition. A railing designed for concrete may not be suitable for the same layout on wood without different attachment planning. The reverse can also be true.
Finish confusion is another avoidable problem. If one document says white railing and another says black railing, the drawing review should resolve the conflict. The final approved drawings should reflect the final selection.
Glass sizing can also create issues. Large panels may look clean, but they need to work with handling, hardware, site access, and installation conditions. For glass systems, small details can make a major difference in the final result.
Railing shop drawings can also help prevent misunderstandings between different types of products. For instance, a project may include aluminum railing on one area, aluminum fencing around another area, and dividers between outdoor living spaces. Each product has a different purpose, so the drawings should make those boundaries clear.
For existing properties, drawing review can also work alongside maintenance planning. If you are reviewing an older system before repair or replacement, Alumiguard’s deck railing inspection checklist can help identify visible issues before decisions are made.
How Builders and Contractors Can Make the Review Faster
A smooth review starts with good information. The more complete the project details are, the easier it is to prepare and approve accurate railing shop drawings.
Builders and contractors can speed up the process by providing current site measurements, recent photos, finished floor details, surface type, preferred railing style, colour selections, and any relevant construction drawings. If the project is still changing, it is better to flag that early than to approve drawings that may soon become outdated.
It also helps to identify one decision-maker for approvals. When too many people review drawings separately, comments can conflict. A coordinated review helps keep revisions clear and efficient.
For repeat contractors, builders, and companies looking for a consistent railing supply relationship, Alumiguard’s business opportunities page is worth reviewing. A dependable manufacturing and supply process can make railing planning easier across multiple projects.
Another useful habit is to review the drawings in the same order each time. Start with the layout. Then check measurements. Then check heights. Then review mounting. Then confirm finish, materials, and special conditions. This simple sequence reduces the chance of skipping an important detail.
Local Planning in Toronto, Mississauga, Vaughan, North York, and the GTA
Railing projects can vary by property type, location, building age, and site condition. A custom home deck in Mississauga may have different planning needs than a multi-unit balcony project in Toronto or a commercial exterior railing project in Vaughan.
That is why railing shop drawings should be reviewed with the actual site in mind, not just the general product type.
For example, a project in a dense urban area may have access limitations. A suburban deck project may need careful coordination with landscaping, stairs, pools, or privacy features. A multi-residential project may require consistent appearance across many balconies, terraces, or common areas.
Alumiguard serves projects across the region, including Toronto, Mississauga, Vaughan, North York, and the GTA. Local experience matters because the same railing system can involve different coordination needs depending on the property and installation environment.
When Should You Ask Questions Before Approving?
If something looks unclear, ask before approving. That is the simplest rule.
Should you approve railing shop drawings if one dimension looks slightly off? No. Even a small uncertainty should be clarified before fabrication. A short question now can prevent a much larger issue later.
Do shop drawings replace permits, engineering, or building code review? No. They support coordination, but they do not replace the responsibility to follow applicable requirements. For broader regulatory context, property owners and project teams can review the Ontario Building Code, the National Research Council Canada, and local resources such as City of Toronto building permit information.
Should you review the drawings if the installer or manufacturer already prepared them? Yes. Professional preparation helps, but the owner, builder, or contractor still understands project expectations, site details, and design preferences. The review process works best when everyone checks the details from their perspective.
Some questions are especially worth asking:
- Are these drawings based on final site measurements?
- Do the railing heights match the required function?
- Are the post locations practical for the mounting surface?
- Do the finish and colour match the approved selection?
- Are glass panels, dividers, gates, and corners clearly shown?
- Is this the latest drawing revision?
If any answer is uncertain, request clarification. Railing shop drawings are meant to create confidence before fabrication begins.
How Property Owners Can Review Drawings Without Feeling Overwhelmed
Property owners sometimes feel that technical drawings are only for contractors or engineers. While some details are technical, owners can still review the parts that affect appearance, function, and daily use.
Start by looking at the overall shape of the railing. Does it match the area you expect? Are stairs, corners, gates, and openings in the right places? Does the layout match how people will move through the space?
Next, look at the style. If you chose glass for an open view, make sure the drawings show glass in the right areas. If you chose picket railing for a classic look, make sure the product notes reflect that. If privacy is a concern, check whether divider locations and heights are clear.
Then look for obvious conflicts. Does a post appear in front of a doorway? Does a gate swing into a tight space? Does a railing return block an access path? These practical details are often easier for owners to spot because they know how they plan to use the property.
Finally, check that the drawing reflects your final choices. A drawing review is not just a technical step. It is also a chance to confirm that the finished railing will match the design you approved.
Better Planning Leads to Smoother Railing Projects
Railing shop drawings are not just paperwork. They are a practical planning step that helps protect timelines, budgets, safety, appearance, and installation quality.
When drawings are clear, everyone works from the same information. The owner understands what is being built. The builder understands what needs to be coordinated. The manufacturer understands what to fabricate. The installer understands how the system should fit the site.
That shared clarity is especially important for custom railing work, exterior railing systems, balcony projects, deck railings, glass railing systems, privacy dividers, aluminum fences, and decorative railing designs.
Alumiguard manufactures and supplies railing products designed for residential, commercial, and multi-unit projects across Ontario. From aluminum railing systems and glass railings to aluminum fences, glass and vinyl dividers, and deco railings, the right planning process helps each project move from concept to installation with fewer surprises.
If you are planning a railing project and want help understanding product options, fabrication details, or the next step before installation, visit Alumiguard’s product pages or contact Alumiguard to discuss your project.
A careful review today can prevent costly corrections later. That is the real value of well-prepared railing shop drawings.

