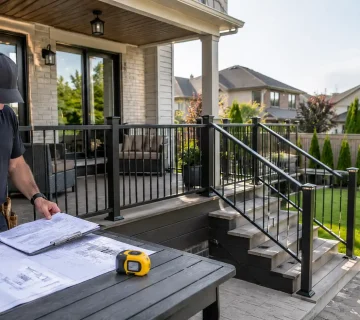
Deck railing inspection checklist season starts as soon as winter lets go. If you wait until the first backyard gathering to notice a wobbly post, a loose fastener, or a damaged glass panel, you are already late.
A proper deck railing inspection checklist helps homeowners catch small issues before they become safety problems, expensive repairs, or full replacements. In Ontario, that matters even more because railings have to handle freeze-thaw cycles, snow load, moisture, salt exposure, and months of repeated temperature swings.
Whether your deck has classic pickets, framed glass, or a more modern setup, a spring inspection gives you a clear picture of what is solid, what needs tightening, and what should be replaced before heavy seasonal use begins. If you are comparing systems while you inspect, it helps to review options like aluminum deck railing systems, exterior aluminum railings, and glass railings so you can judge your current setup against newer, lower-maintenance alternatives.
Why a deck railing inspection checklist matters after winter
Winter rarely destroys a railing all at once. More often, it speeds up small failures that were already starting. A little movement at one post. A hairline crack in a finish. Moisture trapped around a fastener. A bracket that seemed “good enough” last fall.
Then spring arrives, the deck dries out, people lean on the rail again, and those minor issues become obvious.
This is why a deck railing inspection checklist is worth doing before outdoor entertaining season begins. It helps you look at the railing as a complete safety system instead of a decorative edge. The top rail, posts, infill, anchors, stairs, deck surface, and surrounding framing all work together. If one part is weak, the whole assembly feels less secure.
It also helps you separate cosmetic issues from structural ones. A scratched finish may be annoying but manageable. A post that moves at the base is a completely different conversation.
And if code questions come up during your review, use the Ontario Building Code as your baseline reference. Many homeowners know the common 36-inch and 42-inch rules, but actual requirements depend on where the guard is installed and how high the walking surface sits above grade.
A quick visual guide before you start
| Area to inspect | What to look for | What it usually means |
|---|---|---|
| Posts and top rails | Movement, sway, looseness | Fastener failure, weak attachment, or framing issues |
| Fasteners and brackets | Rust, backing out, distortion | Moisture exposure or long-term stress |
| Glass panels | Chips, shifting, gasket wear | Panel instability or hardware wear |
| Aluminum finish | Scratches, bubbling, staining | Surface damage or coating wear |
| Stairs and handrails | Uneven feel, poor grip, movement | Safety hazard under regular foot traffic |
| Deck attachment points | Soft wood, cracks, trapped moisture | Substrate deterioration under the railing |
Your 12-Point Deck Railing Inspection Checklist
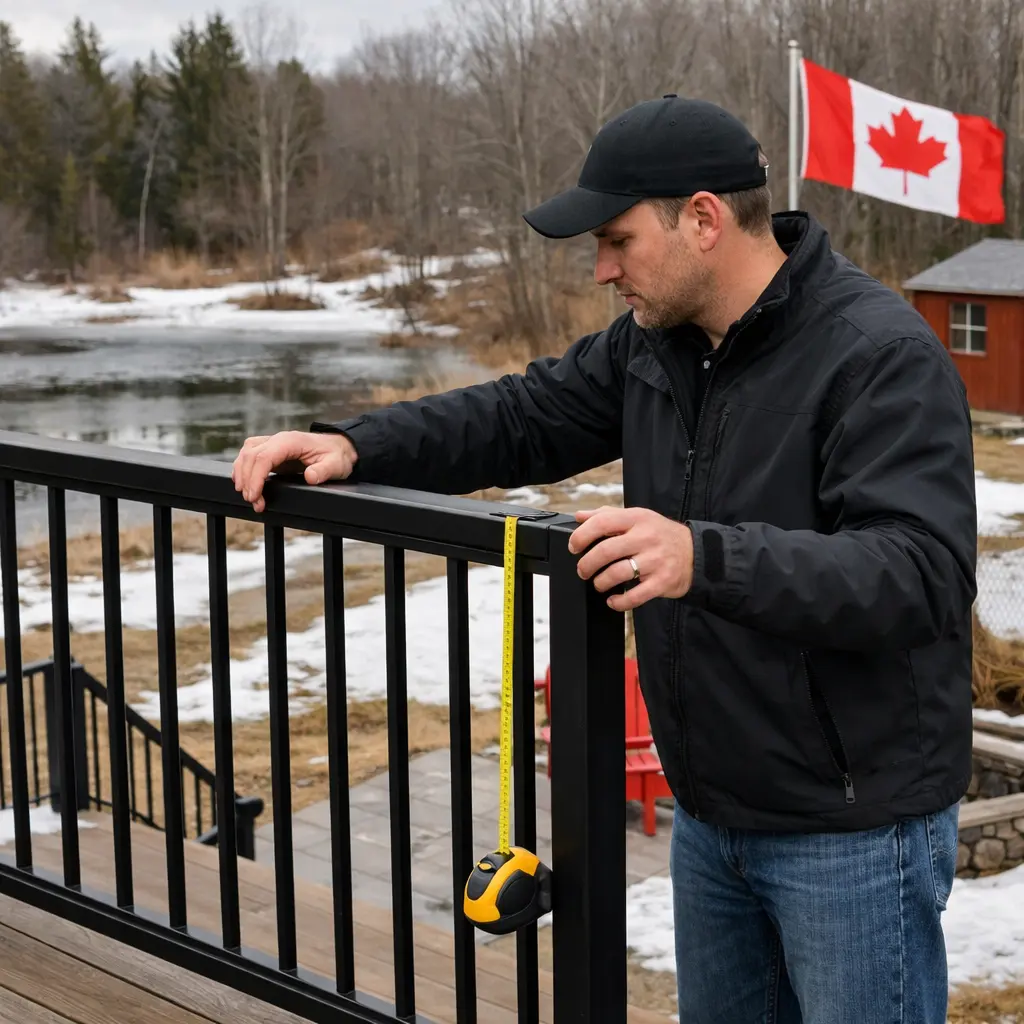
1. Push every post and top rail
The fastest test in any deck railing inspection checklist is simple: apply steady pressure by hand to each post and section of top rail. You are not trying to yank the system apart. You are looking for movement that should not be there.
If a post shifts, even slightly, do not dismiss it. Wobble often points to loosened anchors, weak deck attachment, deteriorated framing below the surface, or an installation that was never properly reinforced in the first place.
A solid railing should feel stable and confident, not springy.
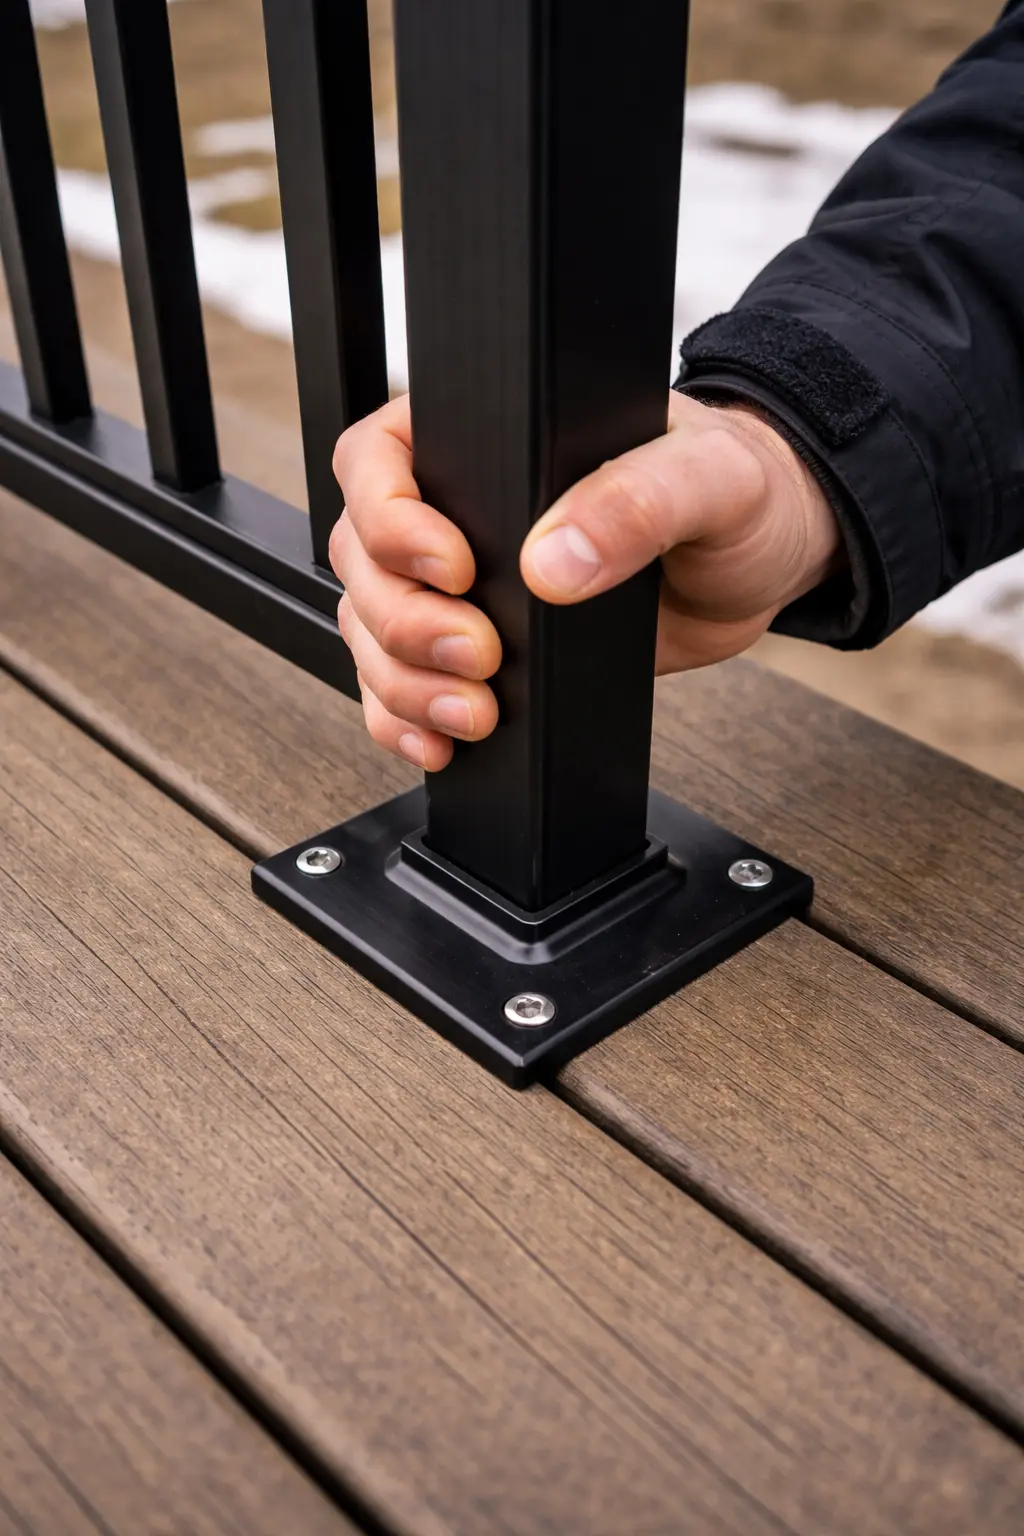
2. Check every visible screw, bolt, bracket, and anchor
Freeze-thaw cycles can loosen hardware slowly. Moisture can also accelerate corrosion around connectors, especially where debris or standing water sits for long periods.
Look for missing screws, rusted hardware, bent brackets, ovalized holes, or bolts that have started backing out. Pay extra attention to transition points where stairs meet a landing or where a railing changes direction. Those spots usually take more stress.
If your railing sits on concrete, compare what you see with Alumiguard MFG’s glass railing concrete-floor installation steps. If it is mounted to wood, review the logic behind glass railing wood-floor installation or picket railing wood-floor installation to spot weak points more easily.
3. Inspect the railing finish, not just the structure
A good deck railing inspection checklist should not ignore surface damage. On aluminum systems, the finish protects appearance and long-term durability. Chips, bubbling, abrasion, or areas where the coating has worn thin deserve attention before they spread.
This matters most on high-contact zones such as top rails, corners, post bases, and stair transitions. Cosmetic wear may not be urgent, but it can tell you where the system is taking the most abuse.
One reason many homeowners prefer aluminum is that it resists rust far better than many alternatives and generally needs less seasonal upkeep. That said, “low maintenance” does not mean “no inspection.”
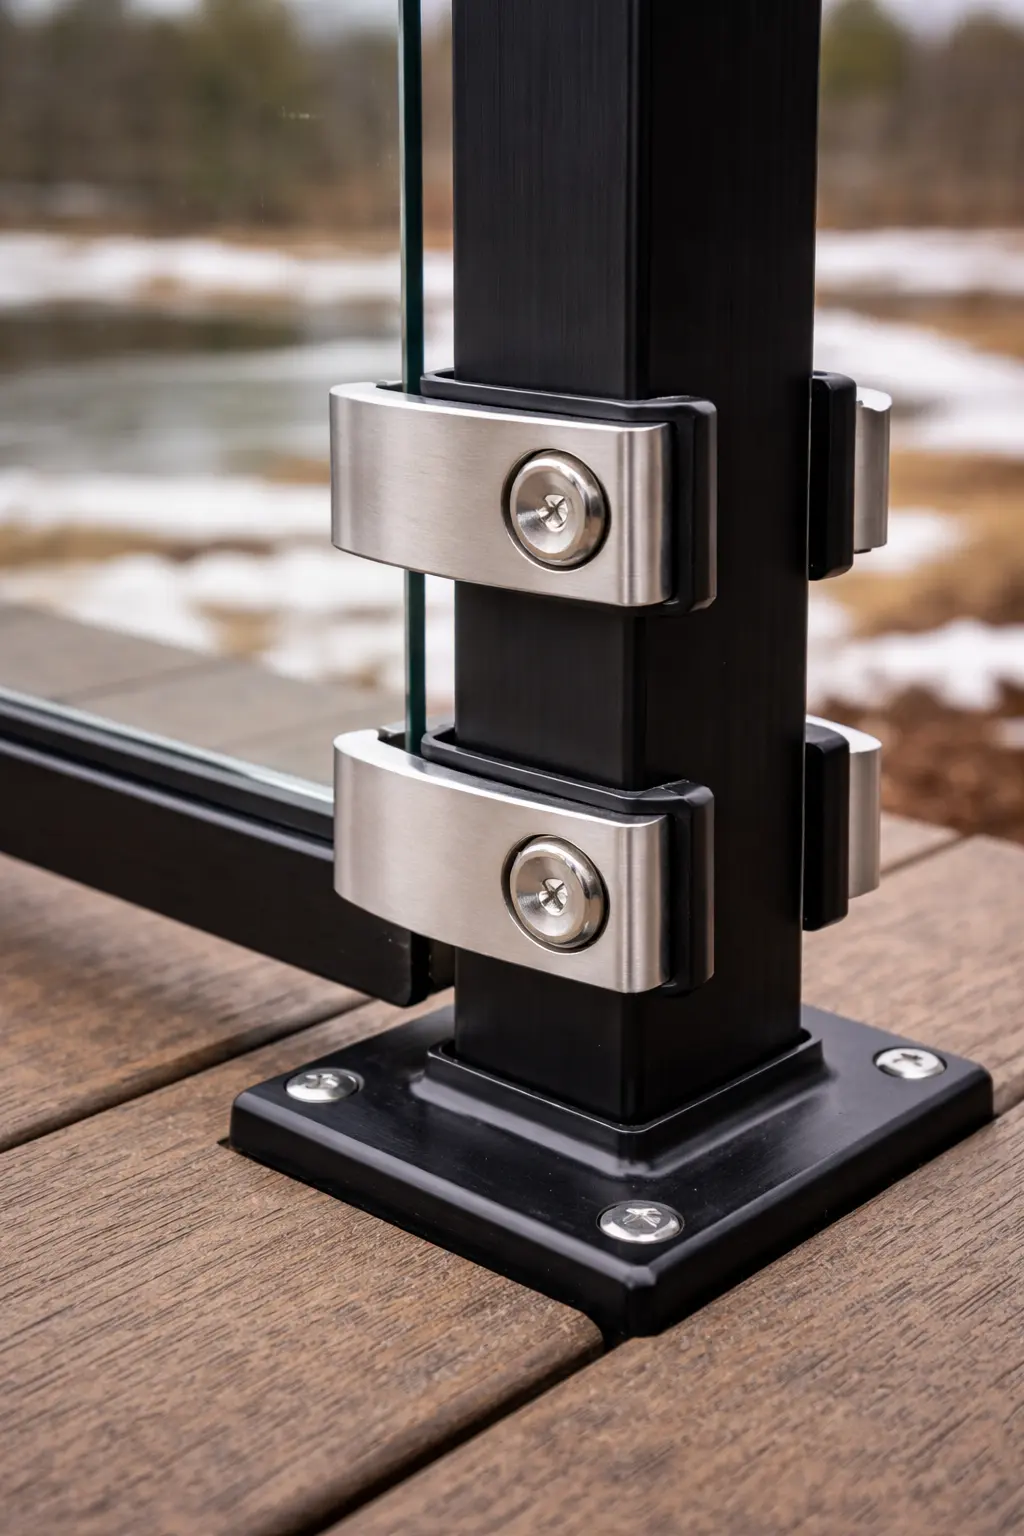
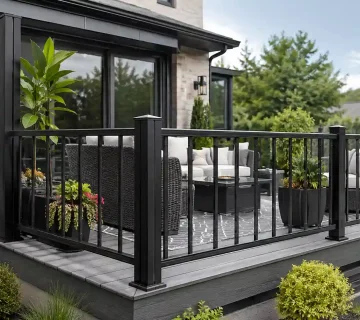
4. Look closely at glass panels, edges, and gaskets
Glass systems need a slightly different deck railing inspection checklist because the panel itself may look perfect while the surrounding hardware is not. Inspect the corners and edges first. Chips, cracks, or impact damage are immediate red flags.
Then check the panel alignment. Does anything look tilted or shifted? Are the gaskets compressed unevenly? Do clips, caps, or channels appear loose? If one glass panel sits differently than the others, that usually points to movement somewhere in the supporting system.
If you are thinking about design and upkeep at the same time, Alumiguard MFG’s post on exterior glass railing for your home is a useful reference for how glass railings perform visually in outdoor spaces.
5. Check the spacing between pickets or infill areas
This step gets overlooked because spacing issues are not always obvious at first glance. But if parts of the assembly have shifted, openings can become inconsistent.
Look for bowed rails, displaced pickets, widened gaps, or any change in the bottom gap between the infill and the deck surface. This is one of the easiest places to spot a system that has settled or loosened over time.
If children, pets, or older family members use the deck often, spacing becomes even more important from a day-to-day safety standpoint.
6. Test the stairs and the graspability of the handrail
A deck railing inspection checklist should always include stairs, because stairs usually show wear faster than level deck sections. Walk the stairs slowly. Hold the rail naturally. Does it feel comfortable and secure? Does any section twist, flex, or sit too far from the hand?
This is also the point where railing and handrail confusion can create problems. A guard protects the open edge. A handrail helps you maintain balance while moving up or down stairs. In some assemblies, one system may serve both functions, but only if it is designed correctly.
For general home safety, the Public Health Agency of Canada’s fall-prevention guidance is a useful reminder that stable hand support and clear walking paths matter more than most homeowners think.
7. Inspect the deck surface where the railing is attached
Many railing problems are actually deck problems wearing a railing costume.
Check the boards, trim, fascia, or framing around every post base and connection point. If the substrate is soft, cracked, split, or water-damaged, tightening the railing alone will not solve the problem. The base it depends on is already compromised.
This is especially important on older wood decks where water may have entered around fasteners year after year. You may not see deep deterioration until the connection starts moving.
8. Look underneath for trapped moisture and debris
A smart deck railing inspection checklist includes what is under and around the deck, not just what is on top. Leaves, soil splash, mulch contact, and blocked drainage can keep key areas damp for long periods.
That extra moisture can affect wood framing, hidden brackets, post bases, and nearby finishes. It can also make surfaces slippery once spring use picks up.
If you notice mouldy buildup, chronic dampness, or slippery film around older adjacent materials, be careful with aggressive cleanup methods. And if you are working around older painted elements, review Health Canada’s guidance on lead-based paint before sanding or disturbing them.
9. Check corners, end posts, and change-of-direction points
These sections tend to hide trouble because people focus on the long, straight runs first. But corner posts and direction changes often carry extra force. They get leaned on harder, bumped more often, and stressed differently from the rest of the railing.
If one part of the system feels weaker than the rest, it is often here.
10. Review any DIY modifications from previous seasons
Homeowners often make quick fixes that hold up for a few months but not for multiple seasons. Added screws, patched holes, improvised blocking, mixed fasteners, or uneven cuts can all affect long-term performance.
If your deck railing inspection checklist reveals an area that was previously altered, examine it twice. And if you are replacing a section of aluminum rail, review how to cut aluminum railing step by step before trimming anything. Clean cuts, correct hardware, and proper reinforcement matter more than most DIY repairs account for.
11. Decide whether the issue is repairable or a sign to replace
Not every problem means full replacement. Loose hardware, isolated finish wear, minor cleaning issues, and some accessory swaps are often repair-level items.
But a deck railing inspection checklist should push you toward replacement when you see repeated movement, cracked glass, multiple failing anchors, severe substrate deterioration, or a system that no longer matches current safety expectations or the way you use the deck.
If the deck has become a true entertaining space, a family zone, or part of a larger exterior upgrade, replacement may be the smarter long-term choice than patching weak points one at a time.
12. Check whether the railing still fits how you use the space today
Sometimes the railing is not failing, but it is no longer the right solution for the way the deck is used. Maybe the backyard has become a place for hosting. Maybe the family wants better sightlines. Maybe the original system feels dated compared to the rest of the exterior.
That is worth considering during your inspection. A deck railing is a safety feature, but it also shapes the look and feel of the space. If your current system blocks the view, feels visually heavy, or no longer complements the property, spring is often the moment homeowners decide to upgrade instead of continuing to maintain an older design.
When a deck railing inspection checklist points to repair vs replacement

Here is a practical way to think about it.
- Repair is more likely when the core structure is sound and the issue is isolated.
- Replacement is more likely when the same problem appears in multiple sections or the supporting deck structure is part of the problem.
For example, a single loose fastener on an otherwise stable aluminum system is a repair conversation. A railing line with multiple moving posts, aging attachments, and moisture damage below the base points is usually a replacement conversation.
That is also where material choice matters. Aluminum systems often make ongoing maintenance simpler, while glass systems can deliver a cleaner sightline if the deck view is a major feature.
How often should you use a deck railing inspection checklist?
At minimum, do a full deck railing inspection checklist once every spring and again before winter. A quick visual check after major storms, freeze-thaw swings, or heavy use is also a good habit.
If your deck is elevated, older, heavily used, or attached to a pool, ravine lot, or exposed backyard area, more frequent inspections are worth it.
A good rule of thumb is this: if people lean on the railing often, the railing deserves more than a once-a-year glance.
Can you fix a wobbly railing yourself?
Sometimes yes, but not always safely.
If the issue is limited to a clearly loose fastener and the surrounding substrate is still solid, a straightforward repair may be possible. But if you are not sure whether the movement comes from the railing, the deck framing, or the attachment method, it is better to stop there and get it properly assessed.
The risk with DIY railing work is not cosmetic failure. It is believing the problem is solved when the structural weakness is still there.
Choosing aluminum vs glass after a deck railing inspection checklist
If your inspection turns into a replacement project, the next question is usually style versus maintenance.
Aluminum picket railings are ideal when you want a crisp, durable system with minimal upkeep and a classic profile. They work especially well for family decks, stairs, entry platforms, and properties where easy seasonal maintenance matters.
Glass railings are ideal when preserving the view is a priority. They suit modern homes, elevated decks, patios, and backyards where openness is part of the design goal.
If your inspection also expands into perimeter safety, gate coordination, or privacy planning, it can make sense to review aluminum fences alongside railings. For broader fence inspiration, Alumiguard MFG also has a useful post on metal fence panels in Canada.

What to do after your deck railing inspection checklist is complete
Once your deck railing inspection checklist is finished, sort your findings into three categories:
- Monitor: small cosmetic issues or areas to recheck mid-season
- Repair now: loose hardware, minor instability, isolated damage
- Replace or professionally assess: recurring movement, glass damage, weak attachment points, or possible code concerns
If your current railing no longer feels dependable, or if you are ready to upgrade the look and performance of your outdoor space, this is where Alumiguard MFG becomes a practical next step.
You can explore the company’s About page to understand its in-house manufacturing approach, then review product options for deck railings, glass railings, and exterior aluminum railings. If you want location-specific starting points, Alumiguard MFG also serves homeowners looking for glass and picket railings in Toronto, glass and picket railings in Mississauga, and glass and picket railings in Vaughan.
And if your inspection already tells you the deck needs professional attention, the fastest move is to contact Alumiguard MFG and discuss the layout, mounting surface, and railing style that fit your property best.
A deck should feel relaxing, not questionable. A proper deck railing inspection checklist helps you keep it that way.


